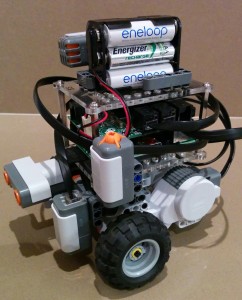
 Third-party sensor manufacturer, Dexter Industries, has produced a small printed circuit board with sockets for sensors and motors to allow LEGO NXT (and some EV3) parts to operate using the increasingly popular and affordable Raspberry Pi credit card-sized motherboard.
The kit, known as BrickPi, acts as an interface between the Raspberry Pi unit and LEGO Mindstorms motors and sensors. The BrickPi can operate as many as four NXT or EV3 motors and up to five NXT sensors.
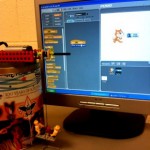
Once the operating system is set up between the Raspberry Pi and BrickPi, users have a choice of what software to program the robot with, including Python, Scratch, C and BlockyTalky.
Sounds pretty cool? And for only around US$65 for the BrickPi, it would seem a no-brainer. Well, before you rush out and buy one, let me first give you a warning and a few tips to help make the journey as painless as possible.
Firstly, having gone through the process myself, I must advise that it is not a ‘plug-and-play’ item. Being used to graphical interfaces and iconic picture blocks when programming with ROBOLAB, NXT-G or EV3 software, I did find typing raw characters on a command line, during set up, a little daunting at first.
My first piece of advice is to buy the right pieces of hardware to avoid making unnecessary modifications to any existing items you may have lying around, such as SD cards and Wi-Fi dongles.
So if you decide to buy yourself a BrickPi (and a Raspberry Pi board if you don’t already have one), the easiest method to get the two working together with fewer steps is to buy the SD card and Wi-Fi dongle from Dexter Industries. (The “Buy!” link on the website below lists all available items for purchase). The supplied SD card will already be configured to work and their recommended Wi-Fi dongle has already been successfully tested on the BrickPi. The BrickPi Starter Bundle would be the way to go, costing only around US$140 for all the essential hardware, including the Raspberry Pi!
Note for Australian readers: Although Dexter Industries is based in the US, they do have reasonable shipping rates to Australia. They are also looking into aligning themselves with a local distributor, so keep an eye out on your local suppliers if you prefer to wait and not pay extra delivery costs.
The next thing I would recommend is to buy yourself a wireless (Wi-Fi) keyboard with touchpad, such as the Logitech K400r. That way you can be more mobile AND you won’t have to buy a separate USB hub when you run out of USB sockets on the Raspberry Pi when fitting a separate mouse.
The rest is ‘simply’ following the seven “Getting Started” steps on the BrickPi website:
http://www.dexterindustries.com/BrickPi/
Some of their steps I found were a little redundant, since it seemed I already had some items that the steps were meant to take me through to obtain. Nevertheless, it is probably best to work through their long list of text and video instructions listed under each step.
In the end I chose to program my hybrid robot using Scratch. I soon discovered however that although I had experience programming with Scratch using LEGO WeDo motors and sensors in the past, programming the Raspberry Pi and BrickPi with Scratch was not as straight forward as I had hoped.
Whatever programming language you choose to operate your Raspberry Pi robot, you will find sample programs to get you going, like I discovered using Scratch. They are fun and you will learn the basics.
Latest posts by John Burfoot (see all)
- Harvey Mk II: Improved Quick EV3 Robot Build - 27 September 2018
- EV3 Sensors - 22 March 2018
- EV3 Simulator using RobotC: QEV3BotSim - 31 October 2016
- Programming Bluetooth on EV3 - 13 April 2015
- Building with RCX/NXT lamps and EV3 pieces - 5 April 2015


