This variation of the classic Ramp Climber challenge builds on the original challenge with the use of sensors to start and stop the robot. Framed in this way, it works well as a very basic intro to programming, including how to download a program, the difference between “wait for sensor” and “sensor” blocks, and even really simple things like the difference between the motor and sensor ports.
The challenge
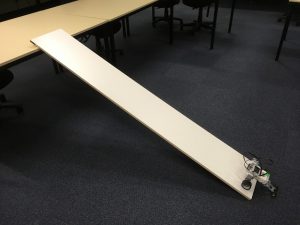
Design and build a vehicle that is activated by a touch sensor, climbs the steepest incline, and stops at the top.
Materials required
- For the ramp, I use a long piece of shelving (e.g. 1800m x 295mm x 16mm melamine-coated particle board) propped against the edge of a table. This gives a roughly 25 degree slope, which happens to provide a slope that’s fairly achievable with the parts in the EV3 kit.
- A spirit level phone app provides an easy way to measure the angle of the ramp.
Teacher notes
The last time I ran this activity, I had a pang of regret that I should’ve brought in a selection of wheels and tracks, but I’m glad I didn’t. It’s pretty obvious that friction would make a big difference, but with everyone using the same wheels (as well as the same motors) from the EV3 kits, it highlighted many of the other differences, such as shape (long and thin v wide wheel bases), centre of mass, and gearing.
In the future, if I wanted to allow more time for this challenge, and particularly if I wanted to focus on the physics involved, I might bring in a selection of wheels and tracks, but only after everyone has had a first pass at a solution.
Although I ask my students to use a touch sensor to start their robots, I deliberately don’t specify how I want the robots to stop at the top of the ramp. I usually don’t even mention sensors at all. Realistically there probably aren’t that many different options but, as always, I like to leave room for alternatives wherever possible. At the very least we can have a discussion about the pros and cons of the different sensors. Some ideas that typically emerge include:
- Setting the motors to move a fixed number of seconds (or rotations or degrees) is not particularly reliable. For example, performance will vary as the motor power changes or the robot’s wheels might slip. A better approach is to turn the motors on until (or while) a particular sensor value is read.
- Using either an ultrasonic sensor or a light sensor to detect the end of the ramp tends to be much more effective and reliable than using a second touch sensor (e.g. using the weight of the robot to press a touch sensor against the ramp), especially if the touch sensor is positioned in a way that compromises the wheels’ contact with the ramp.
- Students who want to use a light sensor (e.g. set to reflected intensity mode) sometimes ask for a strip of black tape at the top of the ramp. It’s interesting to provide this, let them get their robot working, and then remove the tape and see what happens. It turns out that the tape isn’t needed, since the reflected light intensity mode will read the same as black (or more likely lower) when it goes off the end of the ramp. It’s a great teaching moment.
- Instead of (or in addition to) using a sensor to detect when the top of the ramp is reached, what about having a mechanical solution? e.g. once the wheels drive off the top of the ramp, they lose contact with the surface and the robot gets stuck in position, possibly with a hook that drops over the edge.
I have mixed feelings about sharing sample solutions, but appreciate they might be useful if you need some reassurance that you’re on the right track. To that end, here are a couple of possible approaches, intended for teachers. Please don’t share these with students, or at least not until they’ve experienced some productive struggle [external link].
This is approach is possibly the simplest.

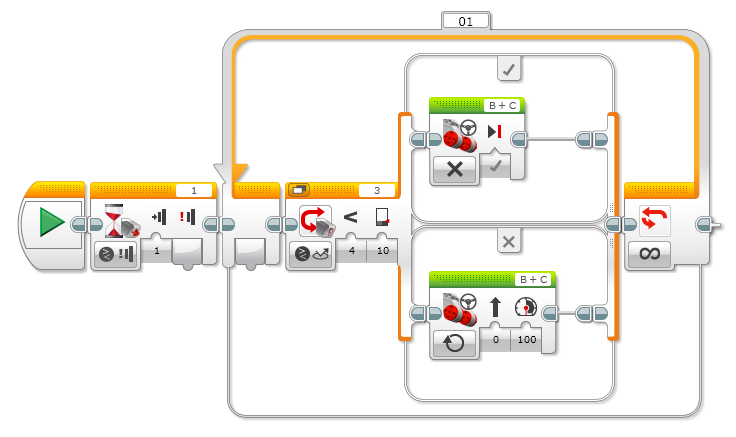
Here is another approach that I quite like. A feature of this approach is that once the robot starts moving, it will stop either when it gets to the top of the ramp or if it is picked up, and will keep moving as soon as it is put back down on the ramp.
As with many of the classic challenges that I’ve given at teacher workshops, I have a handout prepared for this challenge, but as I said in this earlier post, I wouldn’t normally print it out. Instead I normally display it on a projector when giving the challenge to my students.
Download: Steepest Incline 2019 (PDF)
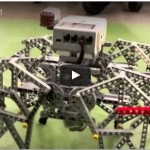
Incidentally, if the robots are allowed to start on the ramp (i.e. with no requirement that they be able to drive onto the ramp), it can be treated as a very different problem. I’ve seen robots that can climb not only vertical slopes, but even slopes that go beyond 90 degrees. i.e. the robot is climbing the slope upside down! I don’t tell the students about these solutions, preferring to see what they can come up with for themselves.
But, just in case you’re wondering what I’m talking about…. (warning: spoiler alert!)
I also added the no grappling hooks rule after someone was given a version of this challenge and were told they could only use the contents of a single EV3 kit. This terrible person then tied one end of the USB cable onto a hook made out of LEGO and rolled the other end onto a makeshift LEGO spool at the other. (And in case you’re wondering, it wasn’t me. Nobody saw me. You can’t prove anything!)
I typically run this challenge within a single 90-min lesson, but on at least one occasion I felt it needed a little more time to run its course, so let it spill over into a second class.
Download: Steepest Incline 2019 (PDF)
Rob Torok
Latest posts by Rob Torok (see all)
- Obstacle Course - 26 August 2020
- Crash Test Dummy - 26 August 2020
- The Wave - 21 May 2020
- Build X - 20 May 2020
- Build a Duck - 20 May 2020
