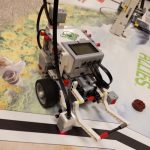
 Some sensors need to be calibrated to make sure they work correctly. I’ve made an EV3 project to help my FIRST LEGO League teams calibrate their sensors and would like to make it available to all the kids out there doing FLL. Something similar was included with NXT for calibrating the light sensor, but the EV3 software is missing it, and I’d like to fill that gap.
The project file Calibration.ev3 includes two simple calibration programs. One to calibrate a gyro sensor and one to calibrate a light sensor (actually a color sensor used as a light sensor).
Gyro Sensor Calibration
Calibration is necessary for the gyro sensor because if the robot isn’t stationary when turned on or when the gyro is plugged in, the gyro may not understand what it means to be still. This can make the sensor value drift.

How does it work?
- The wait block makes sure your robot is completely stationary before calibrating. Do not touch the robot.
- Toggling between “Rate” mode and “Angle” mode makes the gyro understand the current movement as “still”.
- Wait a short time for calibration to complete.
Light (Color) Sensor Calibration
The light sensor may read different values depending on how bright or dark the room is. You’ll want to calibrate it any time the lighting might change to make sure it knows what values are “black” (0) and “white” (100).

How does it work?
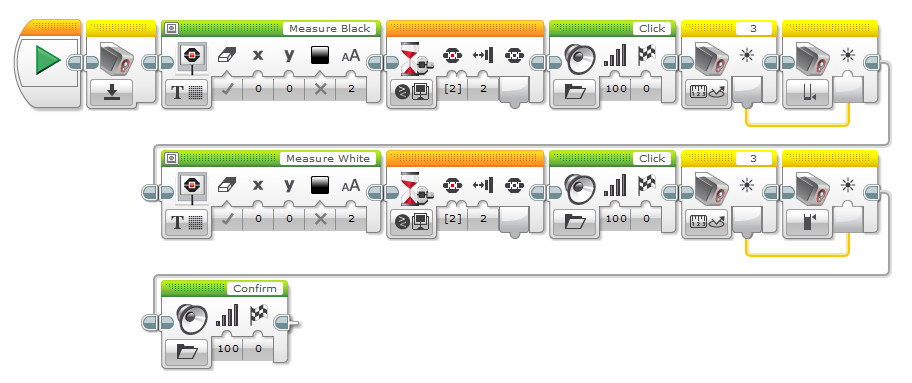
- The program uses wait blocks to wait until you move the robot to the right place.
- Then it takes a measurement and uses that value to calibrate the light sensor.
- Since the sensor uses a raw value with a wide range, it is important to set both the bottom and the top of the range, which is why you need two measurements.
I hope that these programs will help students who are otherwise frightened by the challenges that come with using sensors that require calibration.
Download: Calibration.ev3
Benjamin
Latest posts by Benjamin (see all)
- Light and Gryo Sensor Calibration - 25 January 2017
- Optimal Prime: Another quick EV3 robot build - 9 December 2014


Apologies for being dense, the program is given so I think quite easy to set it up with the EV3 program but how to use it to calibrate?
I know the in thing now is to let learner learn by doing but when he doesn’t know what to do, someone must help him along so I hope there will be someone willing
Hi Peter, thanks for the feedback. Have you downloaded the attached *.ev3 file or are you just going off the screenshot? The project file includes instructions.
I’ll amend the post to make this clearer.
When is it appropriate to use this program? If I use it as a standalone program, a separate file on the robot, will the calibration be in effect for my other programs that are on the same robot? Or do I need to imbed this calibration code into all of my programs and calibrate each time I run a program off the brick?
Amy, the program is written to be used as a stand-alone. For example, when the students first walk up to the mat before the timer starts, they’re given an opportunity to check if everything is in place and to calibrate their robot. That would be the perfect time to run this program.
Remember that the program will only calibrate a specific light sensor or gyro sensor. So if you’re using 2 light sensors, you’ll want to make a copy of this program to work for the other sensor.
On searching on the internet, it seems that the above Gyro calibration will only work for older Gyro’s , for newer gyro you might need a different strategy.
Thank you for a great site
Could you please share the web site address where you’ve found that information?
http://ev3lessons.com/en/ProgrammingLessons/advanced/GyroRevisited.pdf
This paper describes experiments with different models of the Gyro sensor and shows that changing the mode only works for older sensors. Newer ones can be forced to re-calibrate by reading them as an infrared sensor then as a gyro sensor. It also discusses different wait times depending on the mode and shows how to make a loop to programmatically determine when calibration has finished.
I haven’t been able to find this anywhere else and the mode change shown here definitely does not work for our sensor.