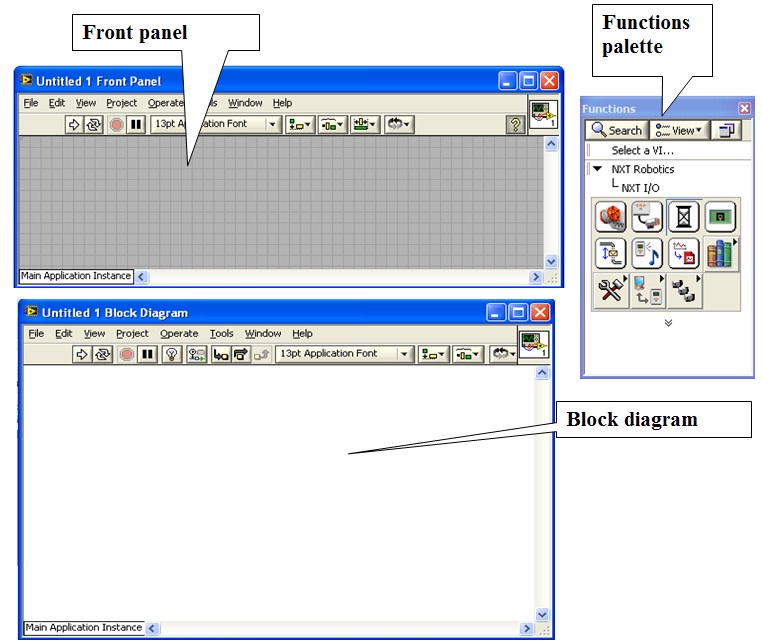
When we start LabVIEW we get a screen that consists of three windows:
Understanding the three windows
- Front panel: This is where we can insert charts, buttons and switches that we can use to control our robot from the PC.
- Block diagram: This is where we do the programming.
- Functions palette: We can find all the commands that we need to create our program. NB! Here we have many advanced commands.
Example 1
We will now create our first program. It will start a motor with a speed equal to 90 and run for 15 seconds. This sounds simple, but in a programming language, one must divide this into several steps:
- Start the motor with the speed equal to 90.
- Run the motor for 15 seconds.
- Stop the motor.
When we make the program we do this in steps:
- Select the commands you need.
- Place them in the correct order in the block diagram.
- Wire the commands together.
- Run the program.
When we make the program it is important to be aware that we are using 4 different tools:
This tool is used to select various commands.
This tool is used to wire the commands together.
![]() This tool is used to control commands at runtime
This tool is used to control commands at runtime
This tool is used to insert texts, and to change the text or values.
When we get up the window shown below:
NB: We can select tools by pressing the TAB key several times. (try this: press the TAB key and observe it will change tools esachtime you press the TAB key).
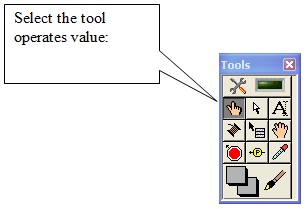
Alternatively, you can select tools fromthe “tools palette”. This window can be displayed by selecting Tools pallete on the View menu. The tools palette is shown below:
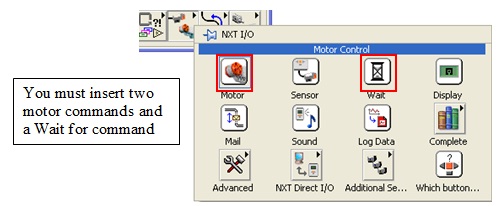
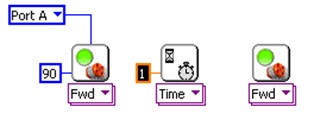
So over to our program. We select the icons we need:
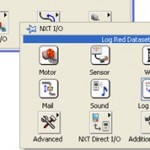
We find these icons in the function palette in the menu NXT I / O:
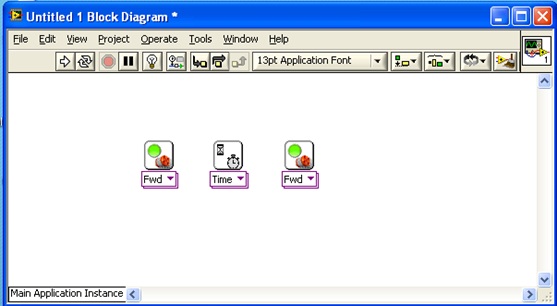
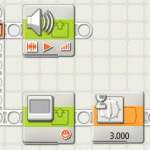
To get a command in the functions palette slide your mouse over the command, hold the left mouse button down until you get a hand symbol and then drag the command over to the blcoks diagram. Try this by pulling out the three commands that you see in the figure above.
Understanding the various commands
![]() This command is called motor on forward and start the motor in the forward direction.
This command is called motor on forward and start the motor in the forward direction.
This is the command wait for time (secs).
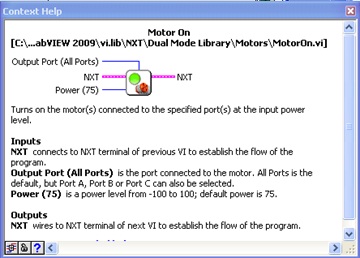
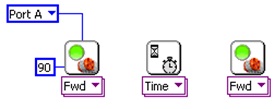
We see that we have two motor on forward commands and one wait for time (secs). But we have yet no command to stop the engine. Let’s look at the help window for the Motor on command. Press CTR + H and then hold the mouse pointer over the command Motor on. You will then get help for the Motor on command in the help window:
We see that the command has four so-called modifiers. We will study this very carefully, it is very important to understand the principle of modifiers. Let’s take a closer look at the command:
 The two modifiers called NXT we will not spend time on. They are only used to select the order of commands to be run. But Output Port (All Ports) and Power (75), we must look into.
Output Port: This modifier tells us which output port on the NXT’ we want to use (A, B or C). The default value is in parenthesis, ie all Ports (A, B and C) at the same time.
Power: Tells us the power for the motor.. This can range from -100 to +100 (negative value means that the motor is running backwards). The default value is +75.
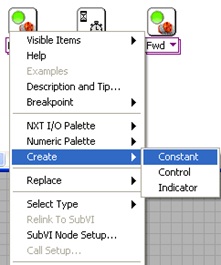
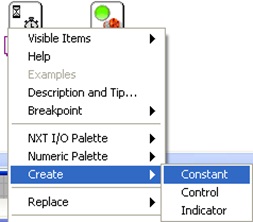
We want to change the value for the Output Port to A and change the power to 90. Then we need to create constants for the modifiers. We first select the wiring tool. So we move teh mousepointer over the lower-left corner, and click on the right mouse button. This will bring up the following window:
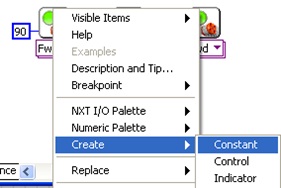
Select create and constant. Now the program will look like this:
Enter the number 90 instead of 75, and you have chagned the power:

To change the modifier up in the middle swe choose wiring tool, move the mousepointer up in the middle, right click and choose create constant:
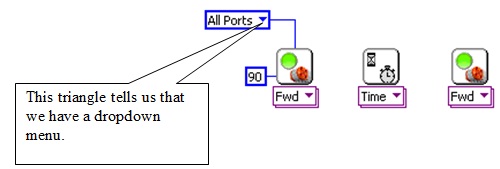
Now it looks like this:
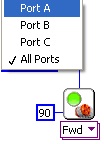
We see that we have a dropdown menu. To use it, we must choose the tool operating value that you can find tools menu:
After selecting this tool, move the mouse pointer over the triangle and press the left mouse button. Then it looks like this:
We choose port A:
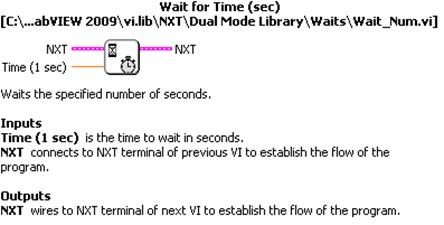
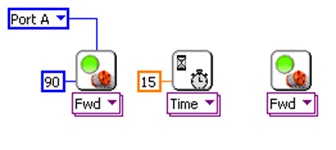
Now this command (icon) is properly formatted. In the program we want to wait for 15 seconds. We take a look at the help screen for the command wait for time (sec) (Press CTRL + H and before the cursor over the command):
We see that this command has a modifier bottom left called time (1 sec). The default is 1 second. We choose wiring tool, move the mouse over the lower left corner, right click and select create contant:
When we release the mouse button so it looks like this:
We write the number 15 and then also this command is OK:
Now we are finished with the second icon. The last one we want for to stop the motor. But it will not work as it is now. How to fix it? Well below the command there is a pink box, and inside it reads Fwd meaning forward. We see that we have an arrow pointing down, and if we choose the tool operates numerical value and press the triangle we get a dropdown menu as shown below:

|
We see that we have two choices: motor on (which is the default) and Motor off. For each of these we have two choices as shown below:
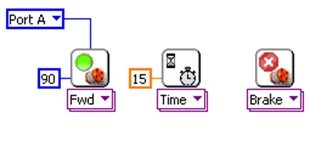
Forward and reverse should be simple to understand. The other two are brake that does stop momentarily (sudden) stop while the coast is a sliding stop. We choose the brake, and then the program will look like this:
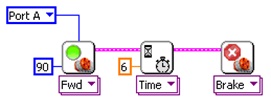
Now all the commands are in their right order. What remains now is to wire the commands together so they will be executed in the correct order. Choose the wiring tool and place it at the top right of theicon Fwd. Press the left mouse button and drag a line to the next command (Time). Press the left mouse button when you’re at the top left of the Time icon. Now it looks like this:
We also have wire the icons Time and Brake together:
The program is now complete. We then connect a motor to output A, and press the Run button:
If everything is done correctly, then the motor will run for 15 seconds. Should something be wrong you will have a run button with a broken arrow as shown below:
When the run button looks like this there is something wrong in your program. If you click on it you will be told what is wrong (NB! It is not always obvious what the error mean).NB: A common mistake is to forget to go from one icon and to the next icon. Instead one has a pink line that skips a command. The pink line will be behind the command we skipped and will therefore be difficult to detect.
Tasks
Congratulation! You’ve finished your Introduction to LabVIEW. To test what you’ve learned in this tutorial, have a go at the following tasks.
Task 1
Change the speed of the engine 60 Tip: Use the text editing tool:
Answer
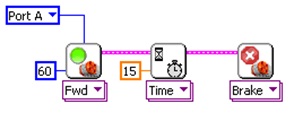
Task 2
Change the wait for time to 6 secs. Tip: Use the text editing tool:
Answer
Task 3
Create a program that first drive a motor for 5 secs. in reverse with power 45 and then for7 seconds forward with power of 50
Answer
Task 4
Create a program that first drive a motor forward for 11 sec. with power 45, so get to start a new engine that runs backward for 16 seconds wirh power 50. After this, both motors should stop.
Answer
Task 5
Create a program that waits until the sound level is above 50dBA%, and then starts a motor with power of 35 for 5 seconds.
Answer
Svein-Tore Narvestad
Latest posts by Svein-Tore Narvestad (see all)
- Create apps for NXT with MIT App Inventor - 3 August 2016
- RicEditor tutorial: Create a cannon game - 28 October 2013
- Create your own games with “RIC” files - 27 August 2013
- How to update the NXT firmware in LabVIEW - 19 August 2013
- Datalogging in LabVIEW: Timed datalogging - 2 June 2013
